
Who loves to host events or gatherings? Well, I certainly do, and I love being able to present something beautiful and yummy for any occasion. What I love more than hosting is trying new recipes and you guessed it, Pinterest is my go-to for the ultimate search (follow me, @Niki Milliken). I love getting the oohs and ahhs when my dish is revealed or asked to share the recipe. Sharing my home with others is one of the reasons I have worked so hard to design a perfect space for my family and company.
I wish I could say that I was naturally talented at all things. News flash, I’m not. When the popularity of one-of-a-kind Charcuterie boards hit the scene I was determined to make a spectacular arrangement of fine cheeses, meats, and nuts. While I did attempt to make a few, the truth was, my display skills were not impressive, so I enlisted the help of a professional. Just like people come to me for professional design assistance, I needed someone with professional cheese assistance.
My very close friend from childhood has a “sister wife”, Teina Moore. If the term “sister wife” caught you off guard, let me explain. This is not a new series for TLC, and Teina is not really a “sister-wife”, but is my friend’s niece and lives with her family, in a private bungalow on their beautiful property. Teina helps run the day to day of their family-owned metal stamping business and has been brave enough to pursue her own, booming Charcuterie venture, SHär’kōōdǝrē by Teina. I knew I needed her help and had a few friends who all agreed we needed to learn her craft. Not only does Teina make irresistible, snackable spreads, but she can customize the board to any occasion. As a female entrepreneur who started a business a few years ago, I wanted to support another woman who had the tenacity to start her own business, so I reached out for help.
Halloween inspired spread
photo courtesy of: shar_kooderee, via Instagram.
Special tropical details for a first birthday bash.

Photo courtesy of shar_kooderee, via Instagram.
I know what you are thinking, these are fabulous, and you are right! So, let me outline the nifty tips and tricks I learned from the Gouda Goddess, Miss Teina Moore.
Where to Start: Teina suggested starting off with a big board when or box to allow room to move things around. I prefer an oversized repurposed piece of butcher block when creating one for an event we are hosting, it’s lightweight and looks rustic. The key for a successful cheese board is the more the merrier, and it gives you an excuse to fill in the spaces with additional goodies. Using small spoons, knives, forks, and small ceramic bowls or bamboo boats are also key to pulling all the elements together. Here is a list of the items she brought to our class, and I will add a link to my Amazon list at the bottom for some of these items and additional items you might want to consider:
- A to-go box or large board depending on the occasion.
- Bamboo spoons, knives, forks with a small bag for transportation.
- Small bowls or bamboo boats for the spreads, olives, and pickles.
- Dried Fruit (peaches, figs, mangos, berries, apricot).
- Pomegranate seeds & fresh fruit (berries and grapes).
- Assorted olives and pickles.
- Various types of nuts.
- Edible flowers (you can find these at Whole Foods or some local grocery stores, here is a great list of edible flowers to look out for or grow on your own: Edible Flowers),
- Spreads (fig, raspberry chipotle, honey).
- Assorted cheese (soft goat cheese, brie, hard cheddar, blue cheese crumbles hard goat cheese).
- Different types of cured meats (salami, prosciutto).
- Various types of crackers and or a sliced baguette.
Placement: Now that we have all the ingredients, the fun part starts. This is also the part I struggled with when I tried to make my own cheese board.
Here are your various steps to cheeseboard success:
1. Place the bows of nuts, honey, and spreads first. They can go anywhere you want just make sure they are not next to each other.
2. Next comes the cheese. Cut the hard goat cheese into triangles, the cheddar into squares, and place them wherever you have room, the brie wheel we cut into slices just like a pie and set it in the box as is. We removed the soft goat cheese log from the wrapper and placed it directly in the box. Don’t be afraid to rearrange each item until you like the way it looks.
3. The meat gets placed next. There are so many things you can do with meat! For example, cheese professionals like to fold the salami into quarters and line it all up next to each other, and this is called the “Salami River”. Prosciutto looks really nice bunched up and stacked and then you can also make a salami rose if desired.
4. Next up are the crackers. I love how they look all in a row. Crackers really help fill the empty space. You can also add baguette slices to fill any empty spaces on the board.
5. Add seeds like glitter! This was probably my favorite part, sprinkling the pomegranate seeds all over with the exception of a small handful that gets pressed into the top of the soft goat cheese log. I love how the red really pops out against the white of the crackers and cheeses.
6. Last but not least, edible flowers. The flowers don’t taste like anything special but they sure do add some brightness and color to the board.
I have included some photos from our class below and the final product. I hope this helps you win over guests at future events.
Dream, Design, and Redefine,
Niki

Photo courtesy of shar_kooderee, via Instagram.
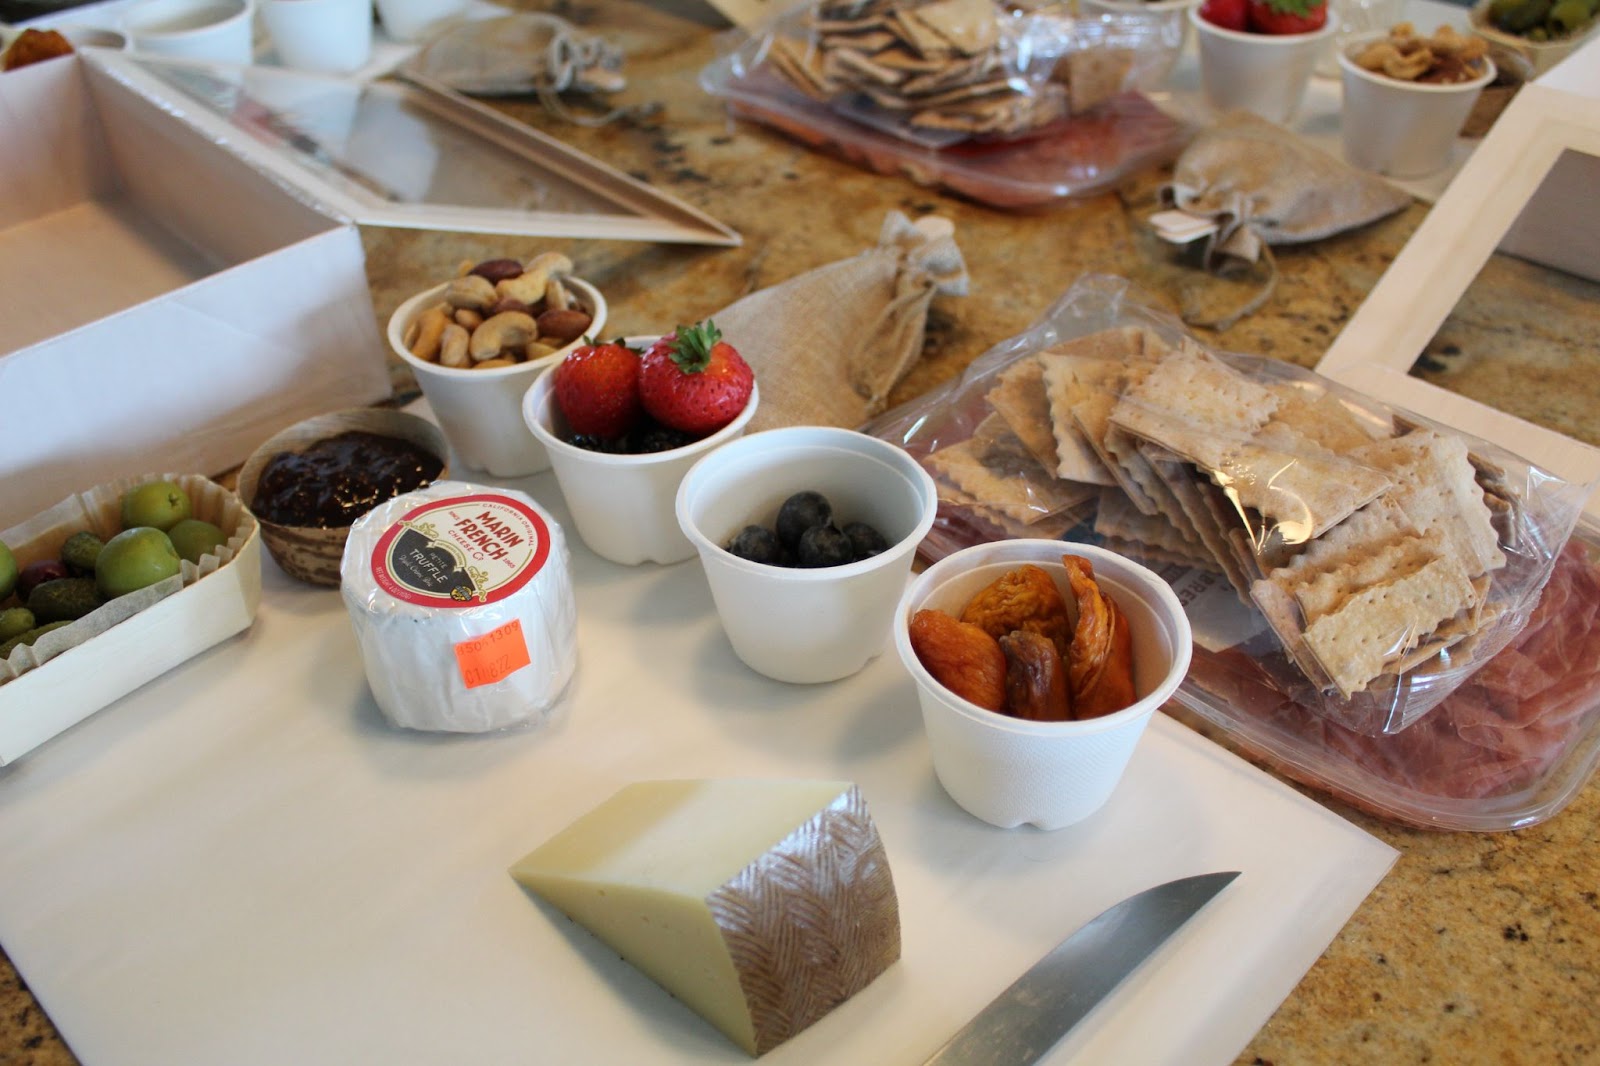
Photo Courtesy of Milliken Design Studio, llc.

Photo Courtesy of Milliken Design Studio, llc.
The Gouda Goddess, Teina Moore.

Photo Courtesy of Milliken Design Studio, llc.
My Amazon charcuterie necessities list (please consider using bio-degradable, compostable items when possible):
Dream. Design. Redefine.
-Niki Milliken
Share

File
Edit
View
Insert
Format
Tools
Extensions
Help
Normal text
Arial
Editing
9
8
7
6
5
4
3
2
1
1
2
3
4
5
6
7
8